Author: user

Introducing Floor Force One

Introducing Floor Force One

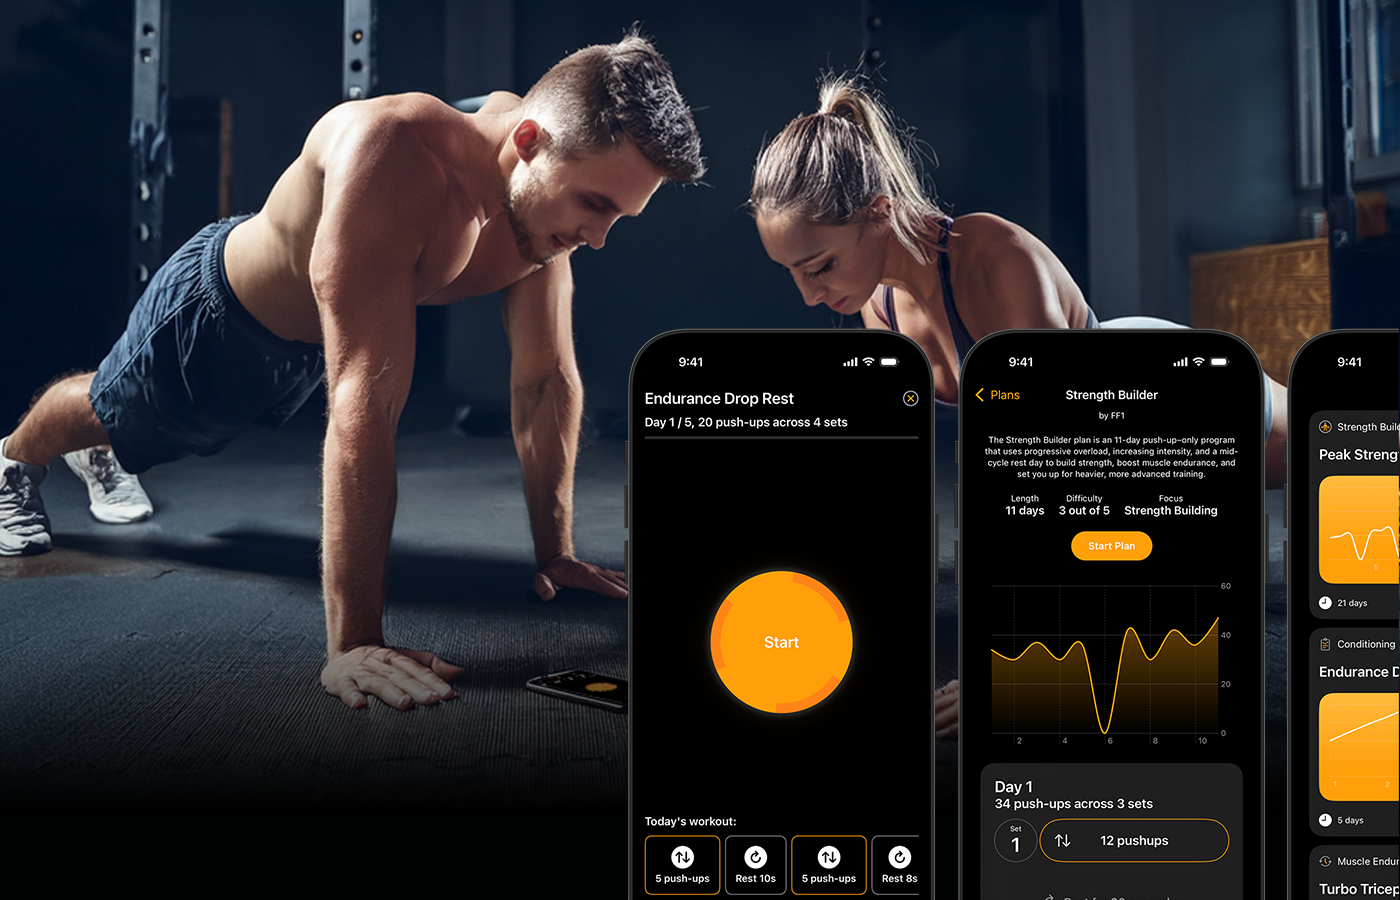
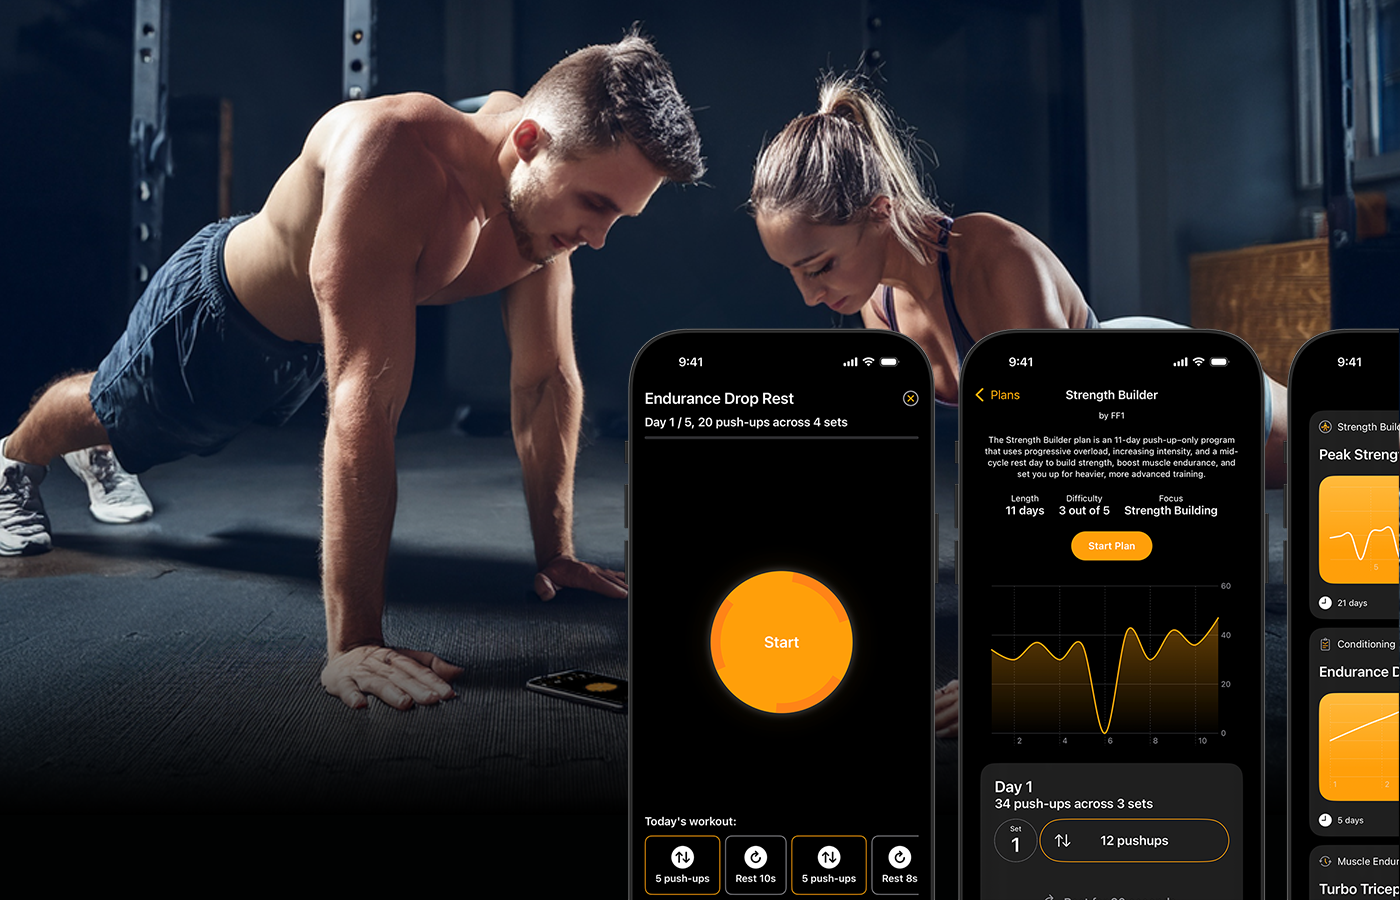
Meet Floor Force One: Your Push-Up Mission Control

Push-ups are a timeless measure of strength, endurance, and form—but most apps treat them as just numbers on a screen. Floor Force One changes all that. This isn’t just another push-up counter; it’s your mission control for upper-body dominance.

Floor Force One uses advanced motion tracking via your device’s front-facing camera to monitor your body from the very bottom of your push-up to the top—and back again. Every rep is captured with precision, and you get feedback as if you were training alongside a real bodyweight coach.

Precision Beyond Counting

Unlike most push-up apps that rely on proximity sensors or button presses, Floor Force One tracks your movement through the entire push-up cycle. A rep is only counted once a full up-and-down cycle is complete, ensuring accuracy and helping you maintain proper form.

Floor Force One also gives you deeper insights into your performance:

  • Biometric Effort Gauge – Your effort is measured and rated using biometrics.
  • Cycle Duration – Track how long each rep takes.
  • Cycle Variation – Measure consistency; high variance indicates form drift.
  • Cycle Distance – Ensure full range of motion, even as fatigue sets in.

Two Modes for Every Goal

  • Free Push – Go all out and see how many push-ups you can complete before stopping.
  • Plan Workouts – Follow structured sets, reps, and rests for targeted strength and endurance training.

Floor Force One is perfect for anyone serious about mastering the push-up. Whether your goal is strength, endurance, or flawless form, it’s like having a personal trainer in your pocket—tracking every move, every rep, every moment.

Push beyond counting. Master every rep. Dominate every set. Floor Force One is here to take your push-up game to the next level.

Find out more at https://floorforceone.com

Continue reading

Refactoring a Symfony application’s notifications subsystem to use EventSubscriber

Refactoring a Symfony application to use EventSubscriber

One of our projects is a Symfony 7 application with a large notification subsystem. Notifications can be sent by push and/or email depending on the event, to users or admins or both, which requires slightly different logic and notification templates. Each notification must respect the user’s settings in a preference system for which notifications a user or admin would like to receive. Additionally, each notification that is sent is added to a seperate user searchable audit log.

Over time, this notification system has become quite large and arguably one of the most important aspects of the system. Up until now, I’ve been calling into this service directly from controllers and services. Which has been more or less ok, except now the notification and audit calls have become larger and more prevalent throughout the codebase. Meaning a big part of any service that should notify gets gunked up by calls into the notification and audit services.

Naturally, notifications are sent after certain domain events occur, such as a booking being made.

My system now has an event object for each of these domain events that is fired from a service. For example, BookingEvent:

class BookingEvent extends Event
{
    public function __construct(private readonly Booking $booking) {}

    public function getBooking(): Booking {
        return $this->booking;
    }
}
I have a single EventSubscriber, NotificationSubscriber that subscribes to all events that require a notification:
class NotificationSubscriber implements EventSubscriberInterface
{
    public function __construct(private readonly NotificationHandlerRegistry $registry) {}

    public static function getSubscribedEvents(): array
    {
        return [
            BookingEvent::class => 'onNotifiableEvent',
            Etc::class => 'onNotifiableEvent',
        ];
    }

    public function onNotifiableEvent(object $event): void
    {
        foreach ($this->registry->getHandlersFor($event) as $handler) {
            $handler->handle($event);
        }
    }
}
In the above, you can see there is a NotificationHandlerRegistry, this is just a good encapsulation for finding all the handlers for each notification and is incredibly succinct thanks to the magic of Symfony’s Autowiring:
class NotificationHandlerRegistry
{
    /**
     * @param NotificationHandlerInterface[] $handlers
     */
    public function __construct(
        /** @var iterable<NotificationHandlerInterface> */
        #[AutowireIterator(NotificationHandlerInterface::class)] private readonly iterable $handlers
    ) {}

    public function getHandlersFor(object $event): iterable
    {
        foreach ($this->handlers as $handler) {
            if ($handler->supports($event)) {
                yield $handler;
            }
        }
    }
}

Symfony will find any class implementing the below NotificationHandlerInterface and stick it in the $handlers iterable

#[AutoconfigureTag]
interface NotificationHandlerInterface {
    public function supports(object $event): bool;

    public function handle(object $event): void;
}
Each of which will be asked if it supports the given event and will have it’s handle method called if it says yes.
class BookingHandler implements NotificationHandlerInterface
{
    public function __construct(
        private readonly ClientNotifier $clientNotifier,
        private readonly StaffNotifier  $staffNotifier,
        private readonly AuditLog       $auditLog,
    ) {}

    public function supports(object $event): bool
    {
        return $event instanceof BookingEvent;
    }

    public function handle(/** @var $event BookingEvent */ object $event): void
    {
        if (!$this->supports($event)) return;

        // masses of notification code
    }
}

Now all of my notification code is lifted out of my services code and replaced with a single call to $dispatcher->dispatch(new BookingEvent()). It’s also much easier to test notifications and as a bonus, I can now see at a glance all the notifications that the system handles in one place. Further down the road when I’m ready to move to a messaging queue or event bus type system, it will be a piece of cake to adapt this subsystem to that architecture. Pretty happy with it overall.

Continue reading

Exploring State in Jetpack Compose

Exploring State in Jetpack Compose

I’m new to Jetpack Compose development and while I’ve been working reasonably productively on a Compose project I’ve found myself trusting in the magic of Compose in some places more than what I’m comfortable with in terms of my own knowledge.

So in this post I’m exploring more of how state works in Jetpack Compose.

Declarative UI shifts the UI development workflow from precedural step-by-step instructions on how to build and manipuilate what the user sees to modelling a state that when mutated will update the UI to reflect the change.

In Jetpack Compose, this is done with composable functions and in most cases MutableState<T>. We can however observe other types of state, as long as when we bind that state to our composable we do so as a State<T>. So although we may have other types we can use to model our state, such as LiveData and MutableStateFlows, at the point at which these types trigger a recomposition in Compose they’re a State<T>; so for the purposes of this post, we can limit our scope to MutableState.

State is generally added to our composables using code similar to this:

@Composable
fun HelloWorld() {
    var greeting by remember { mutableStateOf("Hello")}

    Text(
        text = "$greeting, World!"
    )
}

Any change to greeting in the code above will trigger a recomposition of our HelloWorld() composable.

This post is really about exploring what happens in the single line of code var greeting by remember { mutableStateOf("Hello")} which we sometimes might see written with an = instead of by.

The difference between = and by remember mutableStateOf

The practical difference between = remember and by remember is that when you use by you no longer need to access the .value property of your variable explicitly. So if (foo.value) { } becomes simply if (foo) {} and our code becomes prettier and more concise.

For example:

@Composable
fun FooBar() {
    val text = remember { mutableStateOf("Foo")}

    Text(
        text = "Hello, would you like some ${text.value}?",
        modifier = Modifier.clickable {
            text.value = "Bar"
        }
    )
}

Becomes:

@Composable
fun FooBar() {
    var text by remember { mutableStateOf("Foo")}

    Text(
        text = "Hello, would you like some $text?",
        modifier = Modifier.clickable {
            text = "Bar"
        }
    )
}

Going past the visible code outcome and looking more into what’s going on behind the scenes

When we move from:

val foo = remember { mutableStateOf("bar") }

To:

var foo by remember { mutableStateOf("bar") }

Changing = to by moves from an assignment to a property delegation. Property delegation is a Kotlin feature that delegates the getting and setting of a property to an intermediate object.

This is a cool feature of Kotlin and it’s worth taking a moment to think about what’s going on here. Above, we have to change var to val. At a first take this seems kind of unnecessary, if our delegate is a reference type why do we need to use a var?

It’s because we’re not actually assigning anything here. When we use by we’re not assigning a delegate to foo, we’re telling Kotlin there’s a delegate somewhere we want to be responsible for foo.

It’s easily understood when seeing what the Kotlin compiler does when we use by. If we write something like:

class FooBar {
    var text: String by FooBarTextDelegate()
}

The compiler will generate something like:

class FooBar {
    private val text$delegate = FooBarTextDelegate()
    var text: String
        get() = text$delegate.getValue(this, this::text)
        set(value: String) = text$delegate.setValue(this, this::text, value)
}

So our delegate gets stored in a private property text$delegate and our getters and setters call its getValue and setValue methods.

Our MutableState (returned by mutableStateOf()) delegate just redirects to the value property:

inline operator fun <T> MutableState<T>.setValue(thisObj: Any?, property: KProperty<*>, value: T) {
    this.value = value
}

inline operator fun <T> State<T>.getValue(thisObj: Any?, property: KProperty<*>): T = value

Remembering remember

Let’s remember that remember is needed so our values will survive recomposition. If we rewrote our FooBar composable above and removed the remember whenever we tapped ‘Foo’ it would never change to ‘Bar’ because the update of our MutableState would cause a recomposition which would then ironically cause our value to be lost and set right back to ‘Foo’ on every tap.

Below is the source code for remember:

inline fun <T> remember(crossinline calculation: @DisallowComposableCalls () -> T): T =
    currentComposer.cache(false, calculation)

So we can see when we call remember we lift the lambda out of the composable and onto the cache property on currentComposer.

For this to make sense we need to know that when you add the @Composable annotation to your composable function it rewrites it to accept a Composer parameter:

So

@Composable fun FooBar() {

becomes

fun FooBar($composer: Composer) {

The compiler also does the same for any call to a composable function within that function, which includes remember.

When recomposition happens, if we’ve used remember, the current Composer is passed back into our composable function and its remember function and we have access to our same value that was stored during initial composition again.

Wrapping up

Reading backwards through the line:

var foo by remember { mutableStateOf("Foo") }

from:

@Composable
fun FooBar() {
    var text by remember { mutableStateOf("Foo")}

    Text(
        text = "Hello, would you like some $text?",
        modifier = Modifier.clickable {
            text = "Bar"
        }
    )
}

On initial composition, we get a MutableState for our string "Foo" by calling mutableStateOf

We store that in a lambda which remember adds to a cache on the Composer object that will be passed into it from its containing composable.

We create a delegate with by that makes our MutableState less verbose to work with.

When we change the value of our MutableState from "Foo" to "Bar" we trigger recomposition.

When our Composable is recompositioned the composer containing our lambda which contains our MutableState which now holds "Bar" instead of "Foo" is passed back into it and our Text() now shows "Bar" instead of "Foo" too, because our triggering MutableState was remembered instead of being recreated.

And while this semi-detailed account still skips over a lot of detail, that’s essentially how our state is being handled in Compose.

Breaking it down this way has helped me understand the code I’m writing in Compose a lot better.
Continue reading

Sensortree and Atomdash are day one on the Apple Vision Pro

Sensortree and Atomdash are day one on the Apple Vision Pro

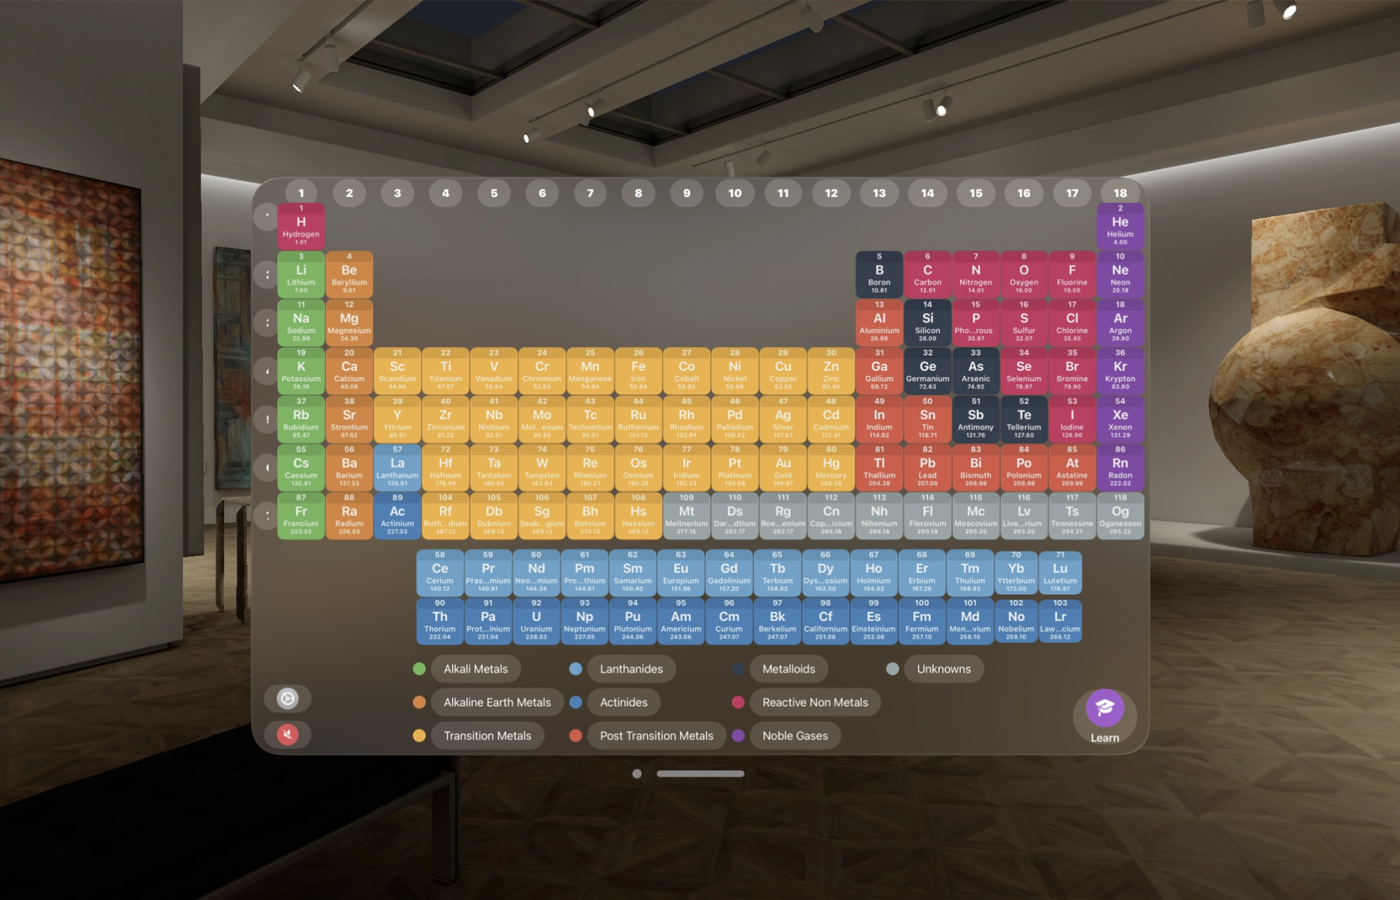
Sensortree are excited to be part of the spatial computing journey with our chemistry tutoring app Atomdash now available as a native visionOS app from day one.

We’ve been super excited for the new Apple Vision Pro from the moment it was announced at last year’s Apple Worldwide Developer Conference. Our team started learning and testing with proof of concepts from the moment the new SDK was available and we have so many exciting ideas for products we could help bring to this new category.

Atomdash seamlessly blended with your physical space

We’ll be the first to admit, a periodic table and chemistry tutoring spatial computing application is a niche use case if there ever was one. But in a world where technology is quickly applied by educators to assist in their goal of motivating and educating young minds, we’re excited to be able to provide the tools to provide engaging education experiences, whatever they might look like.

Spatial computing on visionOS is a category we’re excited to be a part of and we’re committed to supporting the platform on our own and our client’s apps. We’re in the first few days of an entirely new product category and way of interacting with apps that opens the door to more possibilities than can be imagined.

Sensortree are mobile app developers located in Brisbane, Australia – if you’ve got a use case you think would suit the Apple Vision Pro, get in touch with us today for a chat.

Available on the vision OS App Store now

If you’re one of the lucky ones to have gotten your hands on an Apple Vision Pro already, you can download Atomdash from the visionOS App Store right now.

Continue reading

Google Analytics: Understanding Accounts and Properties

So, you’re diving into the world of website analytics and want to make sense of Google Analytics. Great! You’ve taken a crucial step towards unlocking powerful insights into the performance of your website or mobile app. One of the first concepts to grasp when starting out with Analytics is the difference between ‘accounts’ and ‘properties’.

Google Analytics Account: Your Top-Level Folder

Imagine Google Analytics as your trusty digital librarian. An “account” is like the top-level folder in your filing system. It’s the big container where you organise and manage everything related to your online presence. This means all your websites, mobile apps, or any other online entities are housed under one account.

The best practice is to create an account for each distinct business or project. For example, if you run an e-commerce store and have a separate blog related to the e-commerce store, you’d create a single Google Analytics account to oversee both. If you later extend into mobile commerce under the same brand, the mobile app would also be added as a property under that same account.

However, if you created an entirely separate brand or company not related to your e-commerce store, you would create another account where you add digital properties related to the new company. This keeps all your properties nicely separated in logical containers.

But what are properties exactly?

Google Analytics Property: Your Sub-Folder for Each Digital Asset

Now, let’s talk about “properties.” These are like sub-folders inside your top-level account. Each property represents a specific digital asset, such as an individual website or mobile app.

Each property gets its own unique tracking code (you might recognize it as something like UA-XXXXX-Y). This code is your virtual spy, collecting data from that specific digital asset. If you have multiple websites or apps, you’d create a separate property for each.

Why is this useful? Well, it allows you to track, measure, and analyze data separately for each asset. For instance, you can see how your blog is performing in comparison to your e-commerce site without the numbers getting all mixed up.

What’s more, you can customize configurations and views for each property. This helps you filter and dissect data as per your needs.

In a nutshell, an account is like the big boss overseeing your entire online empire, while properties represent individual members of that empire – your websites, apps, or other online assets. This structure keeps your analytics organized and empowers you to dive deep into data analysis and reporting for each piece of the puzzle.

So, remember, in the world of Google Analytics, accounts and properties are your trusty allies for managing and understanding the digital footprint of your online ventures. Happy tracking!